Easy Steps to Create Navigation Menu Above Blog Posts for Optimizing Blog SEO

Downloadmr.com - Achieving the dream of becoming a successful blogger with a quality blog requires well-planned efforts. One key to success is SEO optimization, which demands patience, perseverance, diligence, and high precision.
In this discussion, the focus is on how to create a navigation menu above blog posts. Before delving into the main discussion, let me briefly explain about the navigation menu above blog posts!
This navigation menu serves as a container for article keywords or labels, providing a more structured and informative reading experience. Understanding the importance of the navigation menu can significantly enhance the attractiveness and SEO optimization of your blog.
For example:
Above each post, there are 4 menus and 2 sub-menus for each menu. The layout can be illustrated as follows:
> Sub Menu 2
Menu 2 > Sub Menu 1
> Sub Menu 2
Menu 3 > Sub Menu 1
> Sub Menu 2
Menu 4 > Sub Menu 1
> Sub Menu 2
In this context, the menu is the main category that encompasses the entire blog content. Meanwhile, sub-menu is a more specific category that deepens the content in a more focused and engaging way. With this layout, readers can easily navigate and find the information they are looking for.
Another example:
I discuss two articles in the same category, Technology, but with different topic focuses. The first article discusses "Latest Smartphone Prices 2022," while the second highlights "Innovative Laptop Specifications for 2023."
Overall, both fall under the Technology category with the following topic distribution:
> Laptop
- Smartphone: Latest Smartphone Prices 2022.
- Laptop: Innovative Laptop Specifications for 2023.
With this illustration, it is hoped to make it easier to understand the difference in focus between the two articles, all of which are encompassed in the broad framework of the Technology category.
Similar to other menus and sub-menus, you can create categories that match the content of your article. For a step-by-step guide on creating menus and sub-menus, we recommend reading the tutorial below sequentially to avoid confusion.
Creating a navigation menu above blog posts with the following steps:
- If your blog dashboard still uses the old layout, open the "Dashboard" and select "Theme" or "Themes."
- Next, navigate to the "Edit HTML" option.
For smartphone users, follow these steps:
- Access the "Blogger Dashboard" on your smartphone.
- Choose "Try the new blogger."
- Click on the "three dots" icon in the upper right corner.
- Select "Edit HTML."
The illustration can be seen in the image below.
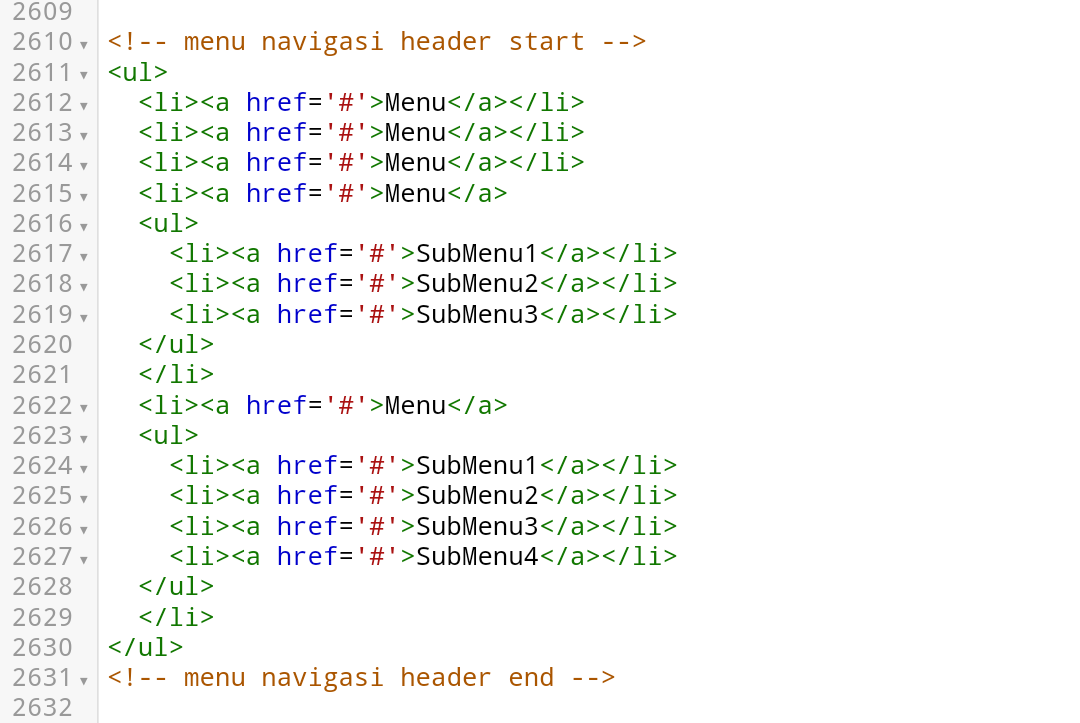
If you have entered the HTML, find the following code:
Once found, replace the # with the URL of your blog page and change the word "Menu" according to your preference.
For example, like this:
To create a sub-menu, do the same as above.
To add a menu, use the following code and place it before the `<ul>` code:
If you want to add a menu and sub-menu, use the following code and place it before the `</ul>` code:
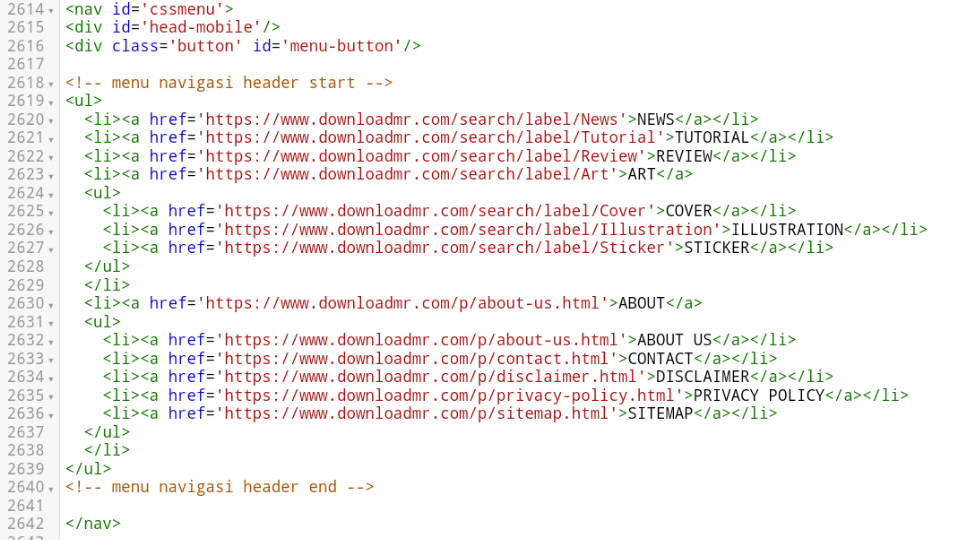
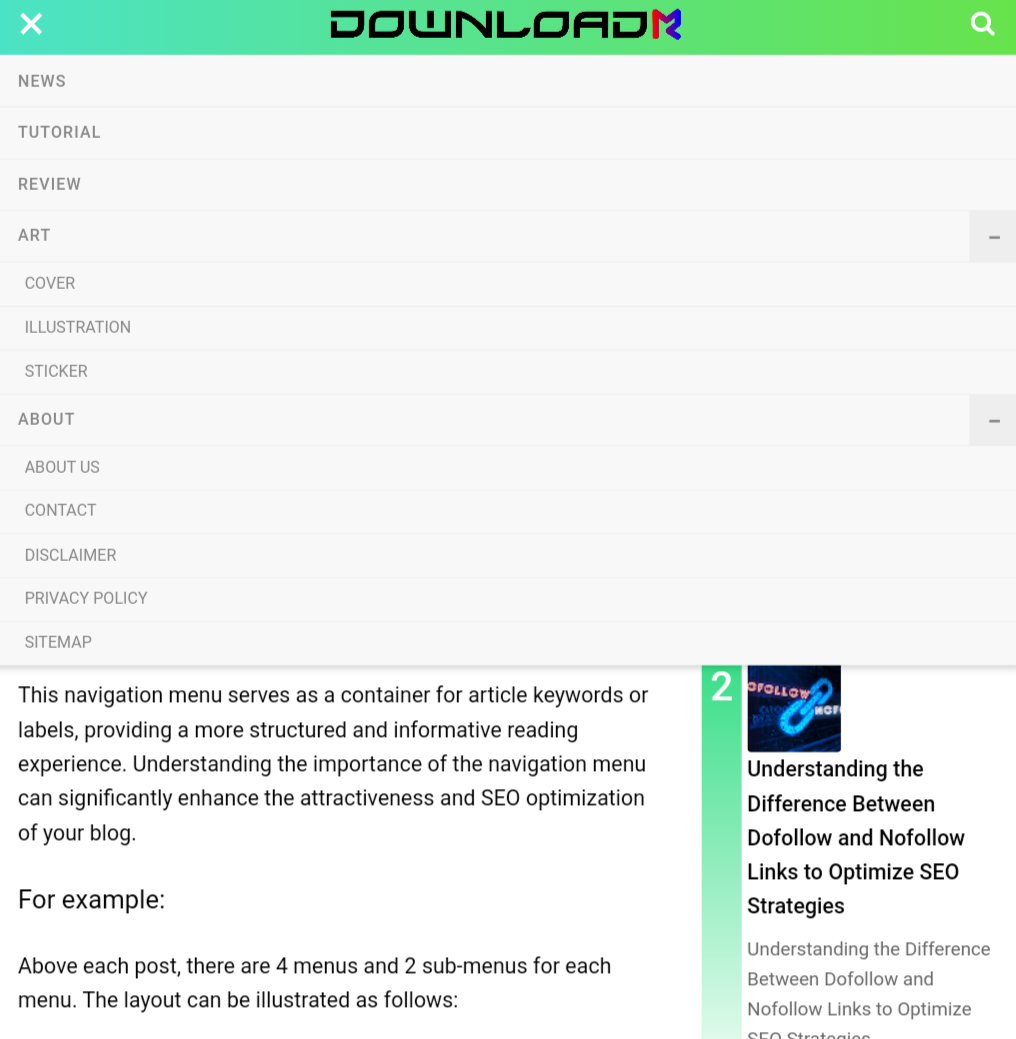
Finally, don't forget to save the changes. The result will look like this:
Post a Comment for "Easy Steps to Create Navigation Menu Above Blog Posts for Optimizing Blog SEO"